Update: 29/01/2020
The Oak was my first attempt at printing wood and since writing this blog two and a half years ago I have changed the paper and tools I use. I now use a wonderfully strong and flexible paper from John Purcell in London. It's a Heritage Rag paper, 100% cotton, unbuffered, Fourdrinier made paper with a vellum surface. It has a full archival specification.
My hand burnishing tool of choice is the bone folder which book binders use. It allows me to press firmly for long periods of time without hurting my joints or fingers. As the paper is strong I can also use the tool to reach into the nooks and crannies of the surface of the wood giving an embossed look to the paper on a relief print!

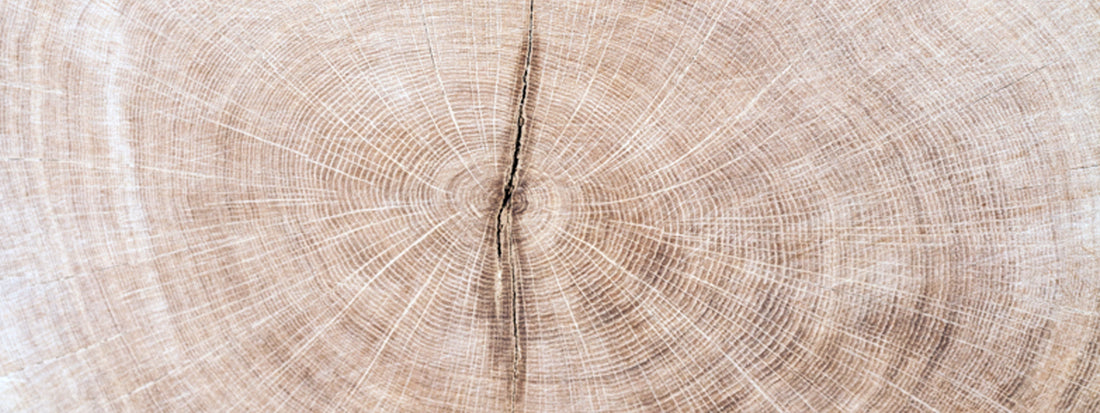
The Oak is my best selling print and she has changed shape and cracked in the last 2 years which has made her more interesting too.


27/10/2017
My interest in printing the wood itself came from having seen the work of Bryan Nash Gill, artist, printmaker and sculptor, who very sadly died in 2013. His book "Woodcut" is beautiful and it shows a large number of the prints he made from whole rounds of wood. He used to go along to woodyards to find interesting pieces. There is also a nice short film about him on You Tube.
I was very keen to have a go at this too, and I mentioned it to the National Trust Staff at Cherryburn where I volunteer once a week to demonstrate wood engraving and traditional printing to visitors. A few weeks later, I was amazed when Mike the ranger who also works at Allen Banks said he had a piece of wood for me. I was blown away to say the least! A beautiful full round of oak which had come from a tree which had fallen. Its 190 years old.
Here is a short video I made showing its location as the rest of the tree is still there:
It was so beautiful I almost didn't want to change it. He had also sanded it really well too so I didn't need to do much to it before burning. I had no idea how much to burn it for- so I researched a bit and found videos on the Shou Sugi Ban technique of preserving wood. Isn't You Tube wonderful for what we can learn and how kind of everyone to share their knowledge and experience!
The round was too heavy for me to lift so I managed to roll it like a wheel outside to burn it. I did this in the summer.

After burning I started to see that it would turn silvery as ash formed and that helped me to tell it was burned enough. I then used a small brush that I had- to clear away all the ash and soot on the wood. This took a while and I know from printing my wood engravings that it's important to make sure that nothing can block or fill in the tiny details.

I then sealed it with shellac so that the ink wouldn't penetrate the surface. I use oil based ink, but when I have printed woodcuts before from plywood the ink still goes into the wood, so sealing it is important.
I then brought it inside for inking and printing. I needed to hand burnish it with a large sheet of Japanese paper. The first print took me ages! More than an hour, so its quite a challenge to be comfortable doing it for a long time. Especially since I wasn't strong enough to lift the wood up onto a higher surface.

I was pleased that all the detail came through on the print, but what I want to improve is the ink covering. I would like it to be more even. My roller is about 4 inches wide, so getting even coverage over the wood is quite hard to determine. When I experiment with colour I will try a mix of the roller and a dabber. A dabber is a traditional inking tool, ideal for uneven surfaces too. Its made of a wooden handle, soft leather wrapped around wood and then tied. I have been given some leather so I am going to try to make one of my own.
I have also already experimented with how I print this oak too.
I wanted to find an alternative to hand burnishing as I thought I would end up with sore elbows quite quickly. I inked it again and put my Fabriano Unica paper over it, and decided that I could try adding 'pressure' by standing on the paper and slowly shuffling about- in a fairly methodical manner, hence using my feet and body weight as a press. It worked! and was a lot quicker too.
Since this first print, I have printed the Elm Burr piece I already had and I have made a trip to Hexhamshire Hard Woods and found some more Elm Burr and some wonderful Cherry. All of which are now printed and are at the framers. I want to experiment with colour inking too. I will print the Oak again soon and want to try to ink with colours which are found on oak bark, so I will take some photos of the local oak trees to study.
Thanks for reading and if you are interested in having a go, do feel free to get in touch. I am very happy to share my experience. I can also offer a workshop in wood printing where you would be able to hand burnish, and take away some fabulous images for yourselves.
Here is the video showing Bryan doing his printing